Not sure how to connect your Sendinblue account to your WordPress site? Then this is your article. Let me explain to you about How to connect WPForms and Sendinblue in WordPress.
Before entering the article we need the all-new WPForms to connect your Sendinblue account to your WordPress,
Alright, now let’s see how to connect WPForms and Sendinblue in WordPress.
How to connect WPForms and Sendinblue in WordPress
I would suggest you follow the below steps in order to connect your WPForms with your Sendinblue account.
Step 1 – Install and Activate the Sendinblue Addon
Note that you need the WPForms plugin installed in order to take advantage of this feature. After the installation process is over, from your Dashboard go to WPForms→Addons and install the Sendinblue Addon.

Step 2 – Go to WPForms integration Page
After you have completed the installation and Activation process of Sendinblue Addon, now you have to connect your account with WPForms. To do this, go to WPForms→Settings and click on the Integrations tab.

Step 3 – Add a New Account
Click on the Sendinblue option to expand its settings. Now click on the Add New Account button to enter your account information.

By clicking on Add New Account you will be shown with two fields and out of those two fields, one is the required field. You will need to add your Sendinblue account API key, as week as a nickname for your account.

Step 4 – Sendinblue API key
Go to your Sendinblue account and click on the menu present on the top right corner of the Page and Select the SMTP and API. There you will find your Sendinblue API key.

Copy the API Key and come back to your WordPress and paste the API key in the required field.

Step 5 – Check your Connection status
Now click the Connect to Sendinblue button. WPForms will connect your site to your Sendinblue account, and it will show a green Connected status next to your Sendinblue integration.

Step 6 – Add Sendinblue integration to Your WordPress Forms
To integrate your Sendinblue to your WPForms, you will need to create a new form or edit an existing form in order to connect it with your email list. Now click on the Marketing tab from the form builder screen and choose Sendinblue. After that, click on the Add New Connection button.

Step 7 – Provide Connection Name
After completing the above step, a popup will be displayed asking for a connection nickname. You can give your required name and then click on OK.

Step 8 – Provide Connection Details
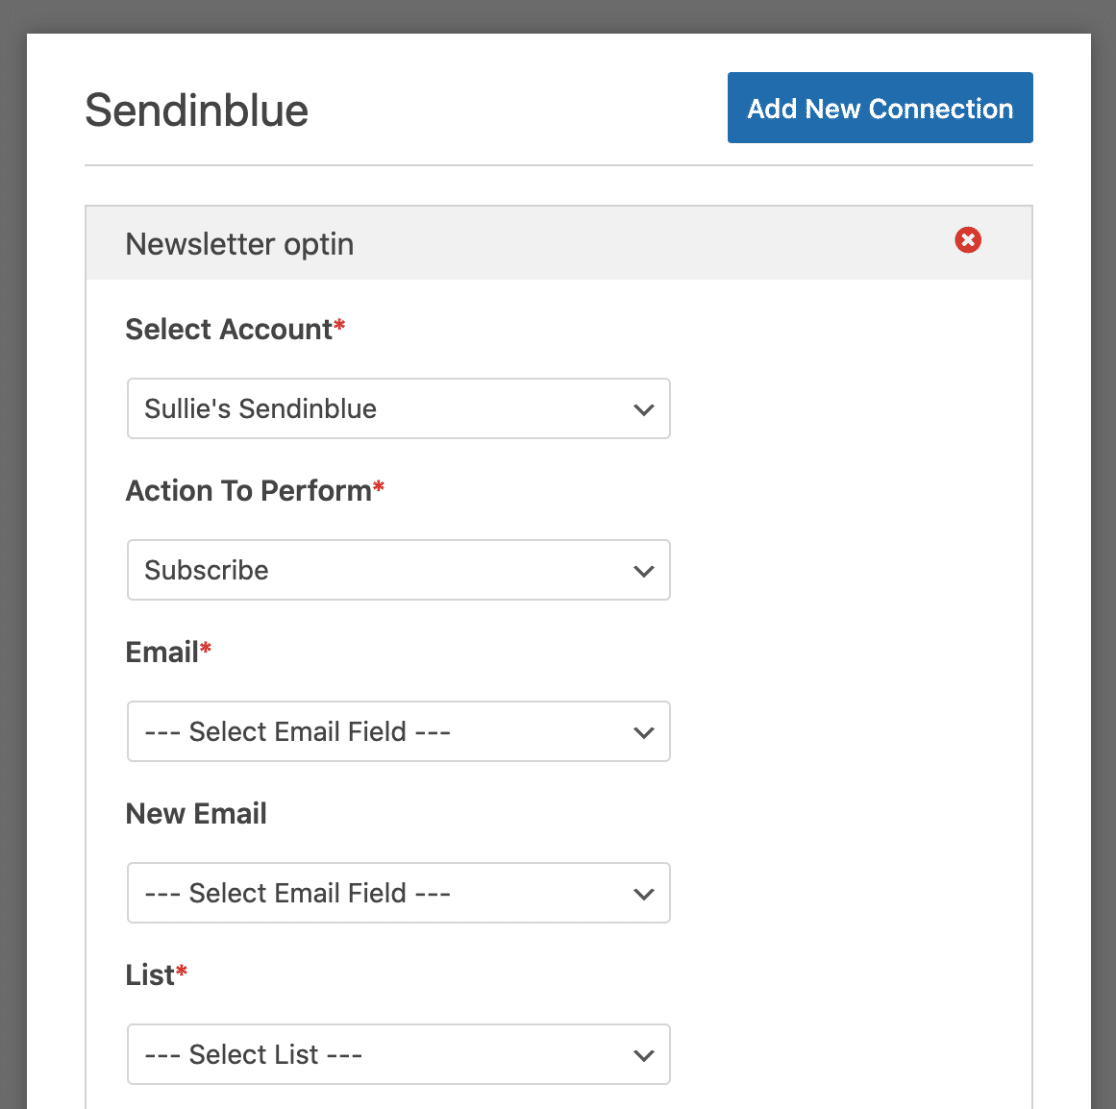
Now, you will be able to select your Sendinblue account and after selecting it follow the steps for your account and it will perform the action for you. Under the Custom Fiels Name section, you can also map custom fields you have created for your Sendinblue Campaign.

Step 9 – Save Your Settings
Now, You Know How to connect WPForms and Sendinblue in WordPress and have successfully have done it with the above steps. But don’t forget to save your settings in order to not lose your data.
Do Check out the WPForms for more features and it is considered as one of the favourite form builders for the WordPress Community. If you are not yet convinced check out my WPForms Review -The Best Form Builder in 2021.
To see more articles on Tech, Travel, WordPress and more Do-Follow my Newsletter.
Like this Post? Do share it with your friends
Continue reading my posts on-


Leave a Reply