Are you, someone who holds a WooCommerce store online?. Then there is something you should know. In this article let us see a piece of detailed information about Why you need to add Google analytics and How to Add Google Analytics in WooCommerce website.
E-Commerce websites that are built with WordPress are Powered by WooCommerce nowadays. WooCommerce is easy to use, highly customizable and looks great. We have been using Google Analytics on our website in order to track its performance. If you are still unaware of What’s Google Analytics and How to Install Google Analytics in WordPress? Click the link.
Google Analytics Enhanced eCommerce tracking helps you to get detailed insights into your customer’s shopping behaviour, helps you to drive more revenue and optimizes your store. Now, Let’s talk about Traditional eCommerce and Enhanced eCommerce tracking.
List of Contents
Traditional eCommerce vs Enhanced eCommerce tracking
As I mentioned above Enhanced eCommerce tracking gives you more detailed data about the shopping behaviour of your customers than the traditional eCommerce tracking.
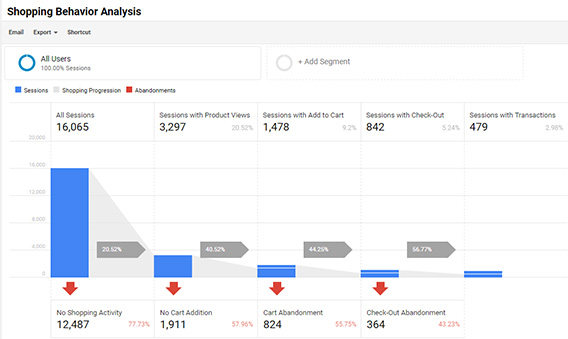
When you enable Enhanced eCommerce tracking on your online store you can get detailed reports on
- Sales performance
- Checkout behaviour
- Shopping behaviour
- Product lists Performance
which you don’t usually get to see in traditional eCommerce tracking.
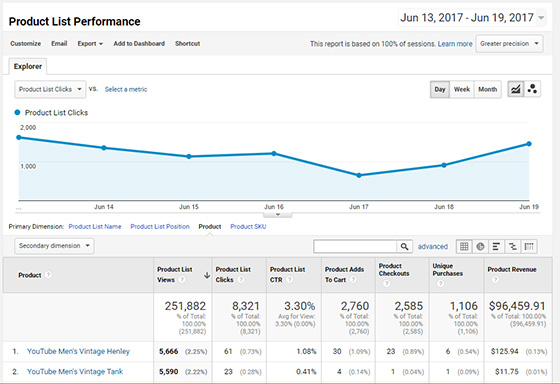
Apart from this, you could also get in-depth reports on Product impressions, Refunds, Transactions, Product clicks and more. You can easily gain more traffic and revenue from your WooCommerce store with the help of these reports. With enhanced eCommerce tracking, you can also determine your top affiliates and it gives you the power to see their transactions, revenue and average order amount.
Now you know what is enhanced eCommerce tracking, Let’s see How to Add Google Analytics in WooCommerce.
How to Add Google Analytics in WooCommerce
To setup enhanced eCommerce tracking for WooCommerce, I suggest using MonsterInsights Google Analytics for WordPress. Basically a free plugin but to enable the enhanced eCommerce feature, you need to be on their pro plan or agency plan. Alright to the topic, to setup enhanced eCommerce feature do follow the below steps.
Step 1 – Install and activate Monsterinsights
To start this whole process, we need to install MonsterInsights. After installing the plugin to WordPress, connect it to your google analytics account. Now, get into your settings page of your plugin and move to the add-ons section to enable the eCommerce tracking addon.
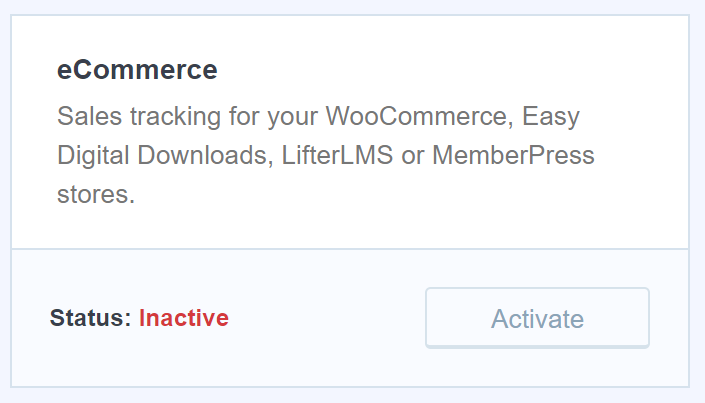
Using this MonsterInsights eCommerce addon you can setup enhanced eCommerce tracking for your online store. This add-on requires a Monsterinsights pro or agency plan. Once the addon is active, go to your google analytics account.
Step 2 – Enable Enhanced eCommerce Tracking in Google Analytics
Login to your google analytics and select the right website you would like to enable enhanced eCommerce tracking for. Then click the admin in the left taskbar.

Then click eCommerce settings under the column on the right.
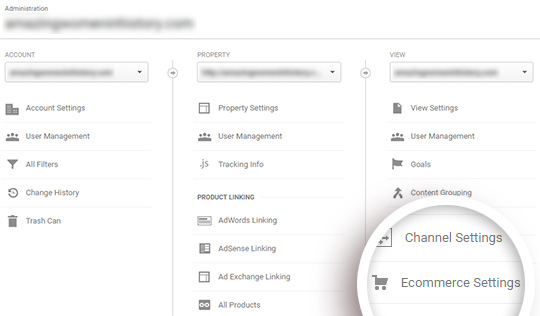
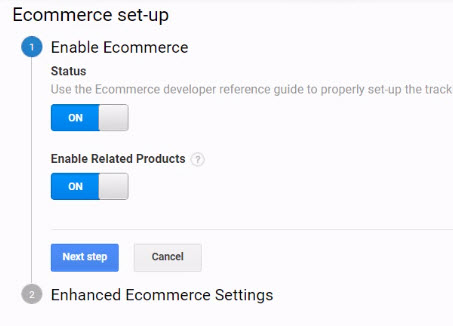
Next, click sliders under status and enable related products, to turn it from off to on. Then click the Next step button.
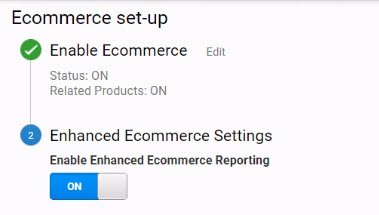
Now, click the slider under the Enhanced eCommerce settings, to turn it from off to on and then, click the submit button.
Step 3 – Enable Enhanced eCommerce in MonsterInsights
Now, go back to your WordPress dashboard and open the Monsterinsights settings page. Now select eCommerce from the top menu. Click and enable → Use enhanced eCommerce.
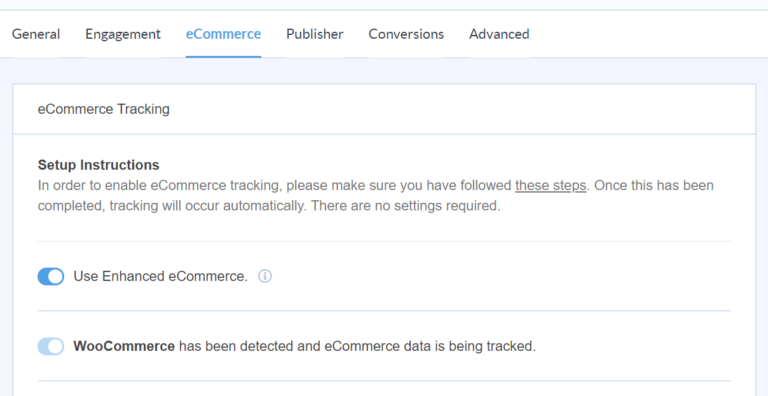
Now, after this process, the addon will automatically start tracking your online store. This data would help you make decisions based on data and will help you to grow your business.
Conclusion
With the help of MonsterInsights, you can easily set up the enhanced eCommerce on your website. check MonsterInsights with the below link
It hardly takes 10-15 minutes to set up Google Analytics on your online store. Share this post with your friends who is in the process of starting a WooCommerce store. To see more articles on WordPress, Tech, Travel and more Do sign up to my Newsletter.
Like this Post? Do share it with your friends
Continue reading my posts on-
- How to create an engaging Multi-step form with WPForms
- 4 Most powerful and useful WordPress Tools
- How to Create Polls in WordPress
- How to Create Online Donation Forms for Nonprofits Organization
- Thalli Pogadhey (Chennai to Pondicherry Road trip)
- How to create a Multi-step Form in WordPress
- How to set up Event Tracking with Google Analytics in WordPress.


Leave a Reply