Have you heard about the Zapier addon?. If not, this post is for you and I will explain to you How To Automate Your Work With Zapier And WPForms.
Before entering into the “How”, let’s see a brief about what is Zapier addon and what are its capabilities.
What is Zapier Addon?
Zapier addon allows you to integrate your contact forms to hundreds of additional web services. After connecting your form to Zapier, we can send your WPForms data to achieve certain task like,
- We can create a lead in Salesforce
- We can create a contact in HubSpot
- You can add a Google Contact
- You can get a Slack Notification
- A customer can send text messages using Twilio
- It allows you to create some beautiful invoices on FreshBooks
and much more. Not just this, it helps you to automate your work and find productivity superpowers. The all-new Zapier Addon allows you to connect your WordPress forms with almost anything you wish. With Zapier integration you can connect WPForms with almost 3000+ web applications that you use in day to day life in order to automate your work.
All you need to choose the trigger (i.e) New Form entry and then select an action you want to perform when a form submits. That’s it… Well, there are many more integrations available with the WPForms and I would recommend using WPForms for all your needs. It is the best Form builder, available in the market and something someone would recommend for a fresher.
Note: If you are new to WPForms don’t worry, it has a helpful drag and drop builder which makes it easy to customize the form. You can add and remove form fields with a simple click.
Alright, now let’s jump into the “How” part. Let me tell you How To Automate Your Work With Zapier And WPForms.
How To Automate Your Work With Zapier And WPForms
Follow the below steps to integrate the Zapier and WPForms.
Step 1 – Installing the WPForms and Zapier addon
The first thing to do is to install the WPForms plugin to your WordPress website. You can do it by click on the above link or you can download it on Your Own. After the installation process is complete, you should install the Zapier addon. Once you have activated the Zapier addon you will need to go to WPForms→Settings and then you should click on the Integrations tab.
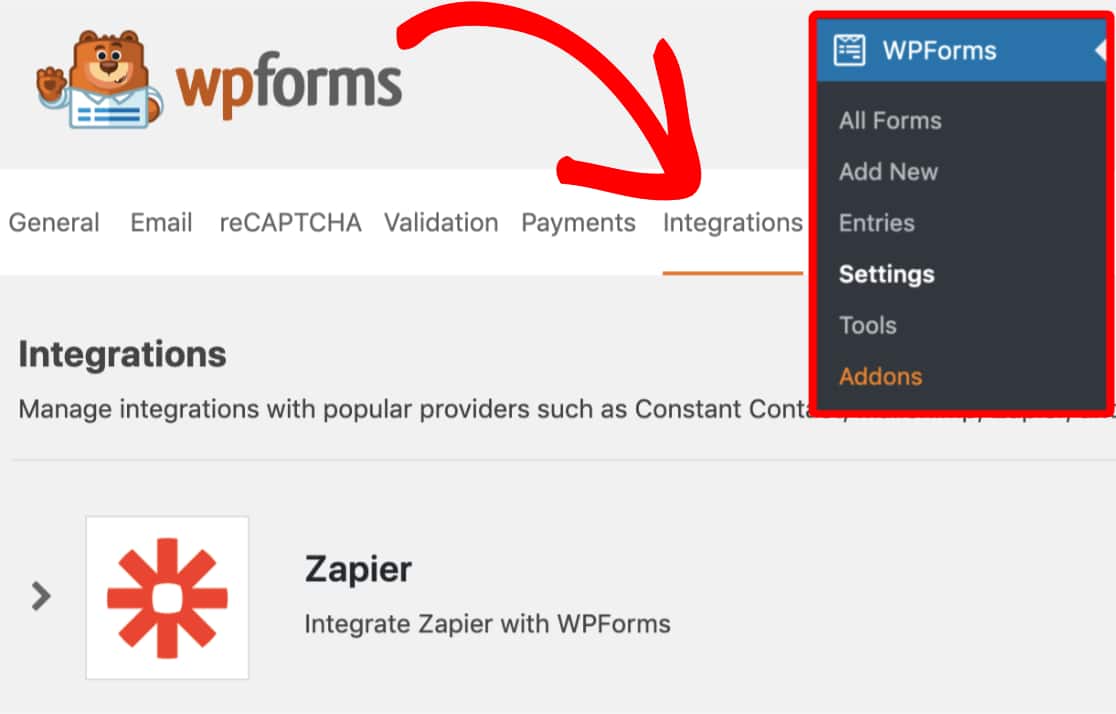
Within the tab, you will be able to see the Zapier option. You should click it to open more details, where you will be able to find the Zapier API key for your site.

Now don’t close this browser because you will be needing this API key in the later step.
Step 2 – Creating a Zap in Zapier
In Zapier, it is said that the integrations you create are called “Zaps”. So, now the next step is to create a Zap that sends information from your forms to another service.
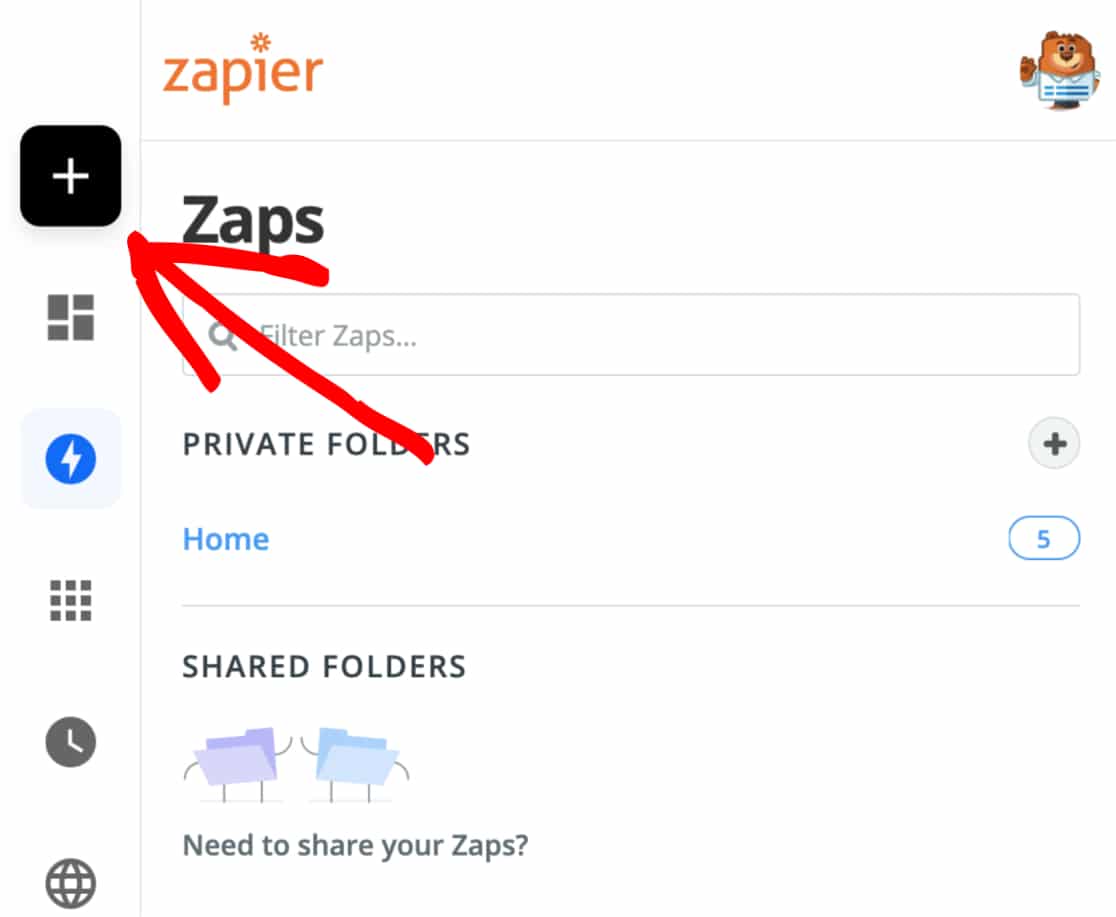
Log in to your Zapier account or create a new one which is a free account. After you have logged in, you will need to click the black + button in the upper left corner.
Step 3 – Fill in the Zap details
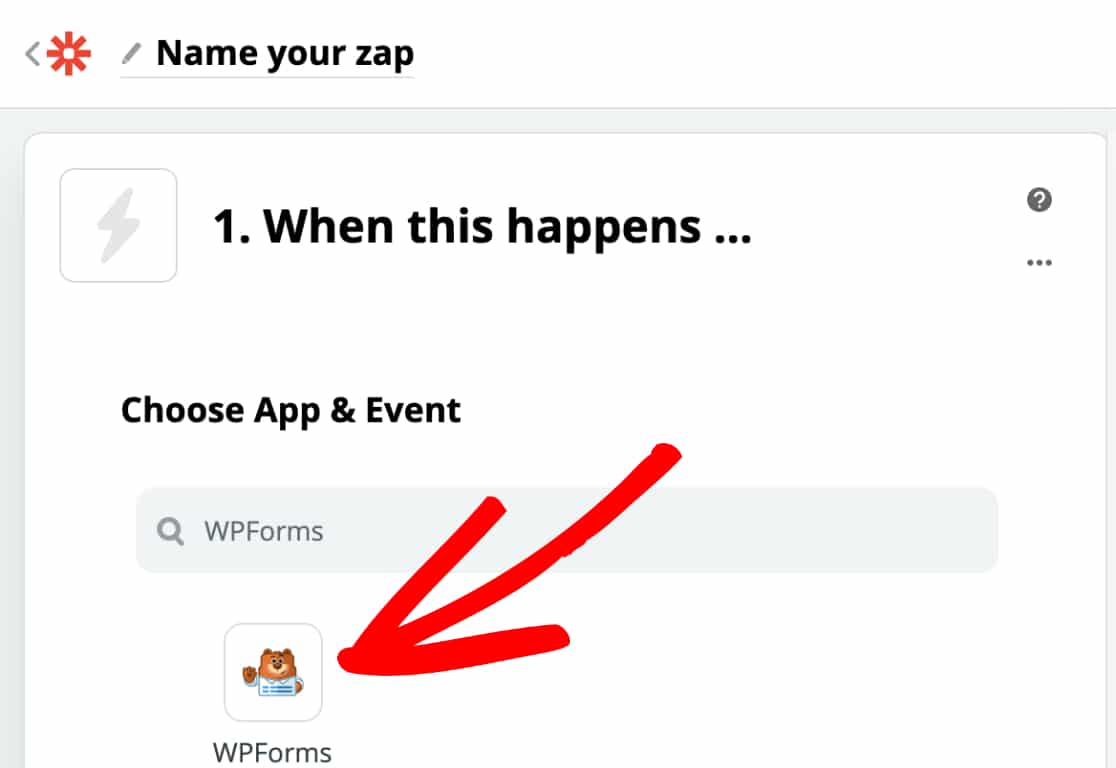
After the previous step, it will redirect you to a new page where you can enter your zap details. Name your zap and choose the WPForms as your first app by searching it under choose App & Event.
Step 4 – Choose the trigger event
After completing the previous step, select New Form Entry as the trigger event and click on the Continue button.

Step 5 – Connect Zapier to WPForms
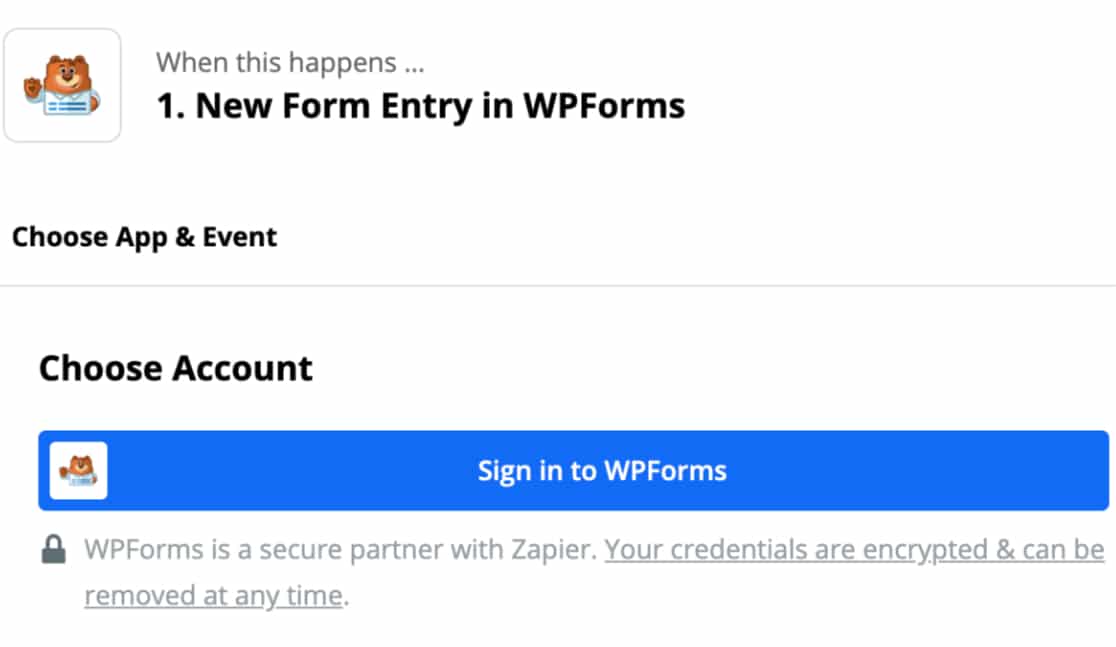
Now, Click on the sign in to WPForms button and enter your API key and your WordPress site URL from where we left in step 1 in order to connect your Zapier account with your WPForms account. Click on the Yes, Continue button whenever you are ready. Now choose an account that you want to use for your zap and click on continue.
Step 6 – Customize Form Entry
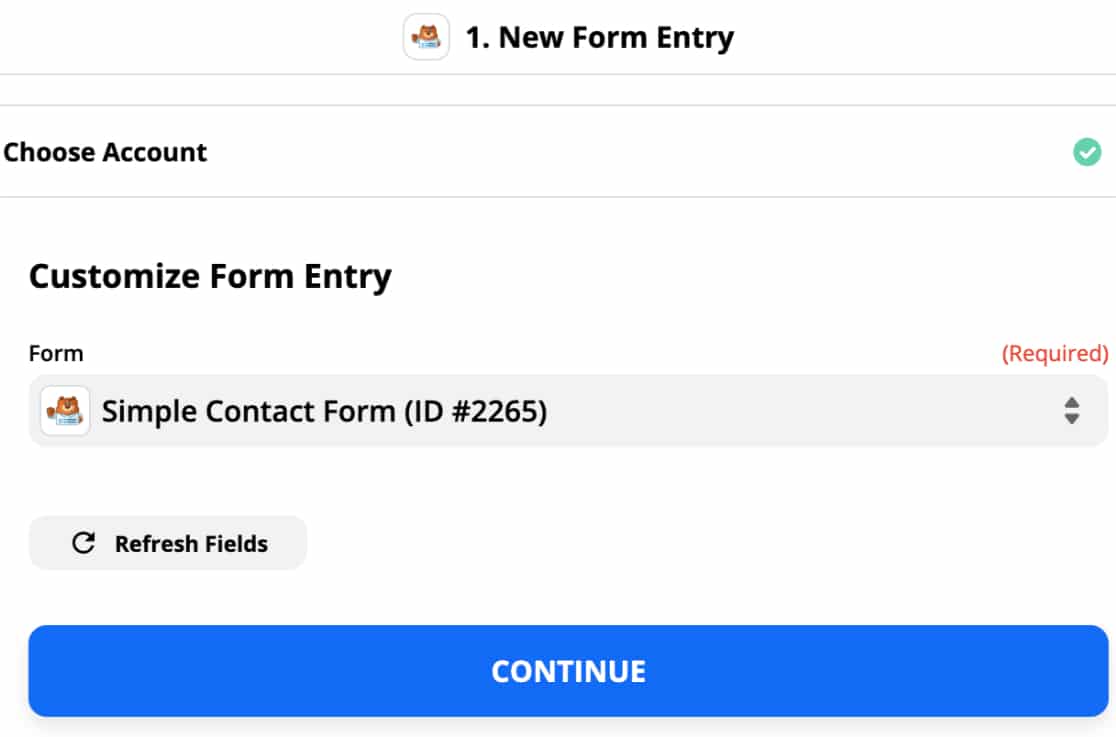
After completing the above steps, you will now be able to customize the form entry. Select the form to connect with Zapier and click continue.
Step 7 – Testing your Form entry
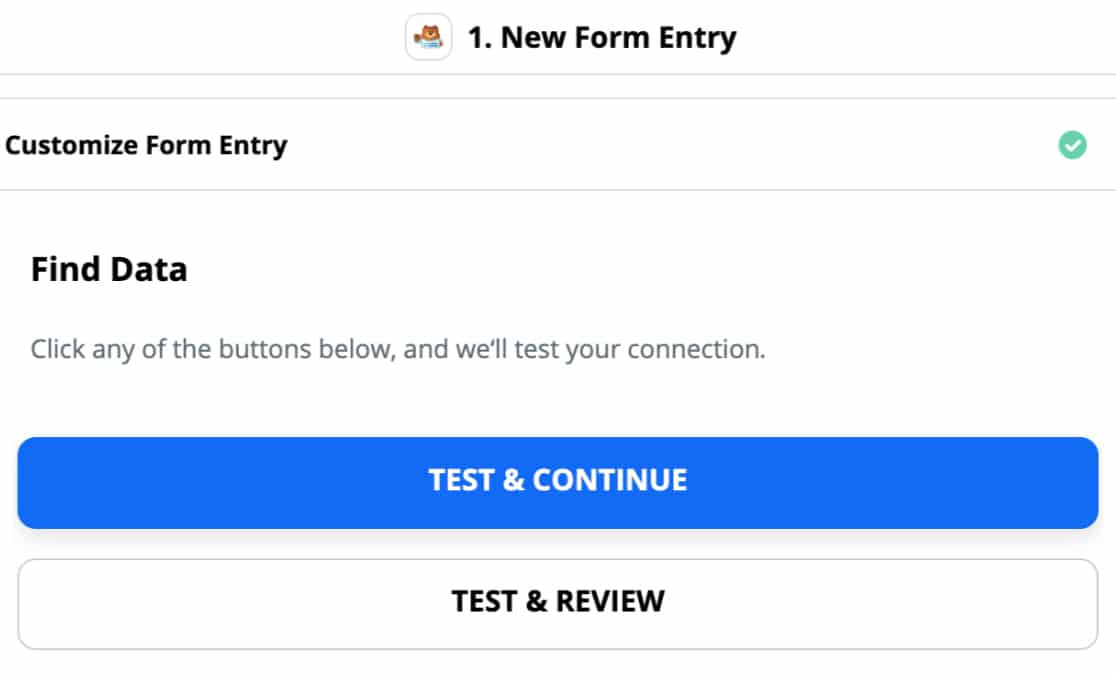
After you click on the continue button on the before step, you will be shown with the Find Data step, where you can put in some sample entries to test your connection. Click on the Test & continue or the Test & Review button before continuing the steps. This will help you to understand whether your integration is successful or not.
Step 8 – Choose Target app and event
Now, in this step try choosing the target app where the data you get from WPForms should be sent and what it should be sent and what it should do with it. The Steps will be shown to you according to what app you choose.

Well, that concludes the step to integrate with Zapier. Now you know How To Automate Your Work With Zapier And WPForms. Get the WPForms today with the below link,
You can also check my WPForms Review -The Best Form Builder in 2021 for more information. To see more articles on Tech, Travel, WordPress and more Do-Follow my Newsletter.
Like this Post? Do share it with your friends
Continue reading my posts on-
- How to Connect Stripe with Your Payment Form
- How To Collect Paypal Payments on your WordPress site?
- How to Easily Create Awesome Exit Intent Popups that Drive Sales
- The Best Survey Software in 2020
- How to Connect WordPress Website Leads And Salesforce (CRM)
- How to Create a WordPress Order Form With Online Payments
- How To Easily Set Up Form Conversion Tracking in Google Analytics


Leave a Reply