Heard of Spin Wheel?. If not you are in the right place. If you know about it and still confused How to Create Spin to Win Campaigns in WooCommerce and Shopify, this article is for you…
Alright, Before entering into the topic How to?, Let’s first see about What’s a spin to win campaign?.
List of Contents
What’s a Spin to Win Campaign?
Spin to win is a campaign which allows your user to avail some exciting offers from your side. It moreover looks like a spin wheel game. In this campaign, your user will be asked to enter their email address, name, contact number, etc… By entering that required information the wheel asks for, your user can participate in the campaign. So, Your users play a game to win discounts, unlock special offers, or access downloads after playing the game.
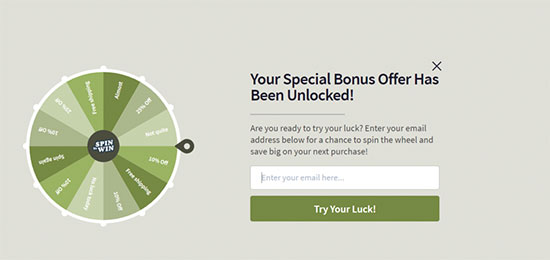
Your Next question could be How will we get benefitted by this feature?. I’ll tell you how. The reason is really simple, adding gamification to your website you create attention among the users, you encourage them to make a purchase in your website by giving them coupons. According to a survey, adding gamification to your website increases conversions. There had been a lot of success stories with this spin to win campaign and more importantly, you capture their email address and contact them for more exciting offers in your website and make them visit your website often.
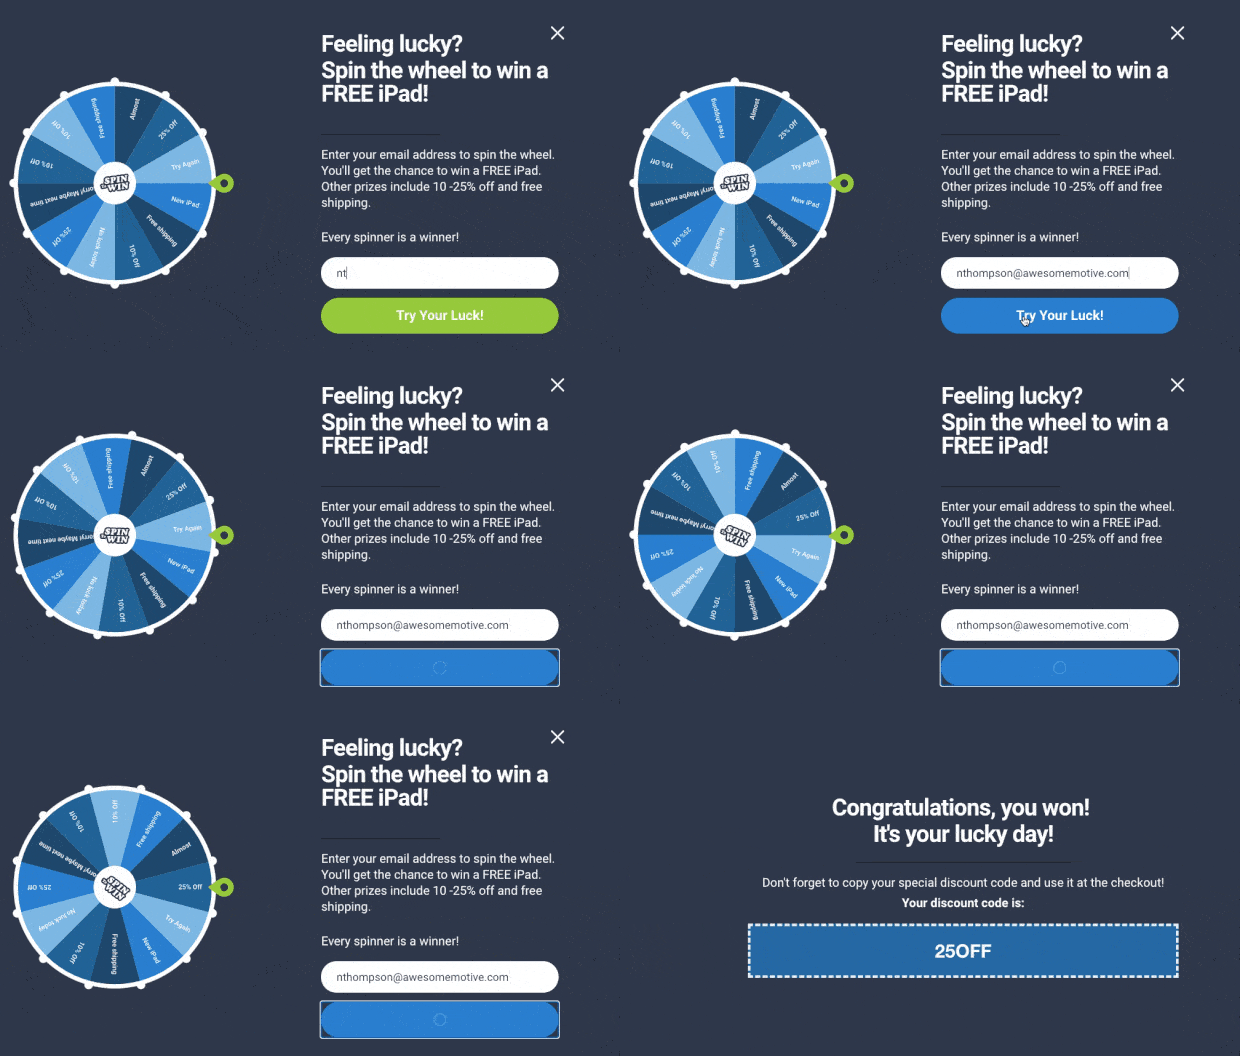
You could have seen these spin wheel campaign in the amazon website and the mobile application. They use this to offer their user some exciting offers so that the user will be able to purchase the products they like with the earned coupons. This strategy helps to retain their users and keep them visiting their website often. Alright, now you know What’s a Spin to win the campaign. Now, its time to learn How to Create Spin to Win Campaigns in WooCommerce and Shopify.
How to Create Spin to Win Campaigns in WooCommerce and Shopify
Follow these steps in order to create spin to win campaigns on your WooCommerce and Shopify websites. To continue creating this campaign you would need the OptinMonster plugin. You could have heard about OptinMonster for sure.. One of the best lead generation plugin available in the market.
Don’t worry!!! It doesn’t need even a single line of code. It’s super easy. OptinMonster is a premium plugin which is used by hundreds of thousands of websites. Alright into the creation part, let’s do it step by step.
Step 1 – Installation and Activation
First, You have to go to the OptinMonster website and create an account. Second, As I mentioned OptinMonster is a premium plugin so you will have to purchase the “Growth” plan to access the ‘Coupon Wheel Campaigns’ feature. Check out OptinMonster plugin and Download it to keep track with this tutorial.
After this, you need to install and activate the OptinMonster plugin on your website. Now after the activation process you will be able to see the OptinMonster menu in the sidebars.

Step 2 – Creating the Spin to Win Wheel Campaign
Now, You have installed and activated the plugin, connected to your WordPress account what’s next?. Well, all you need to click on the “Create New Campaign” button to start creating your first spin to win campaign.
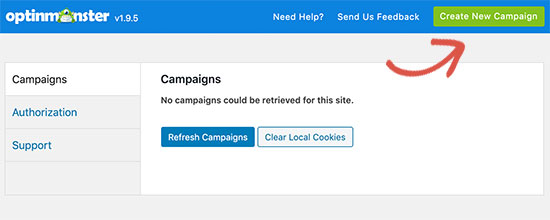
Now, select the campaign type. To add spin to win campaign in your WooCommerce and Shopify website, you have to select the campaign type as Gamified.

Step 3 – Choosing the Campaign Template
After selecting the campaign, it will automatically display you with a popup of how your spin to win wheel looks. All we have to do is to set your spin wheel rules, modify the text and add custom prices. Choose a colour you want to display your campaign. In OptinMonster there are 3 templates available with the colours blue, green and red. Choose the best one you think will fit your campaign.

Now, after selecting this all you have to do is to name your campaign, which is important to remember your campaign, then assign it to your website and click on start building.

Now, let’s customize the spin to win popup.
Step 4 – Modify Your Spin to Win Wheel Campaign
With the Inline editor in the OptinMonster, you can easily click on the text you want to change and modify it directly in the OptinMonster editor. Using the inline editor, continue to make modifications as you like by changing the design, colour, fonts and more. You can click on any item to change its appearance.

Now, you need to edit the values of the coupon wheel sections by clicking on the “Edit Wheel Section” button.
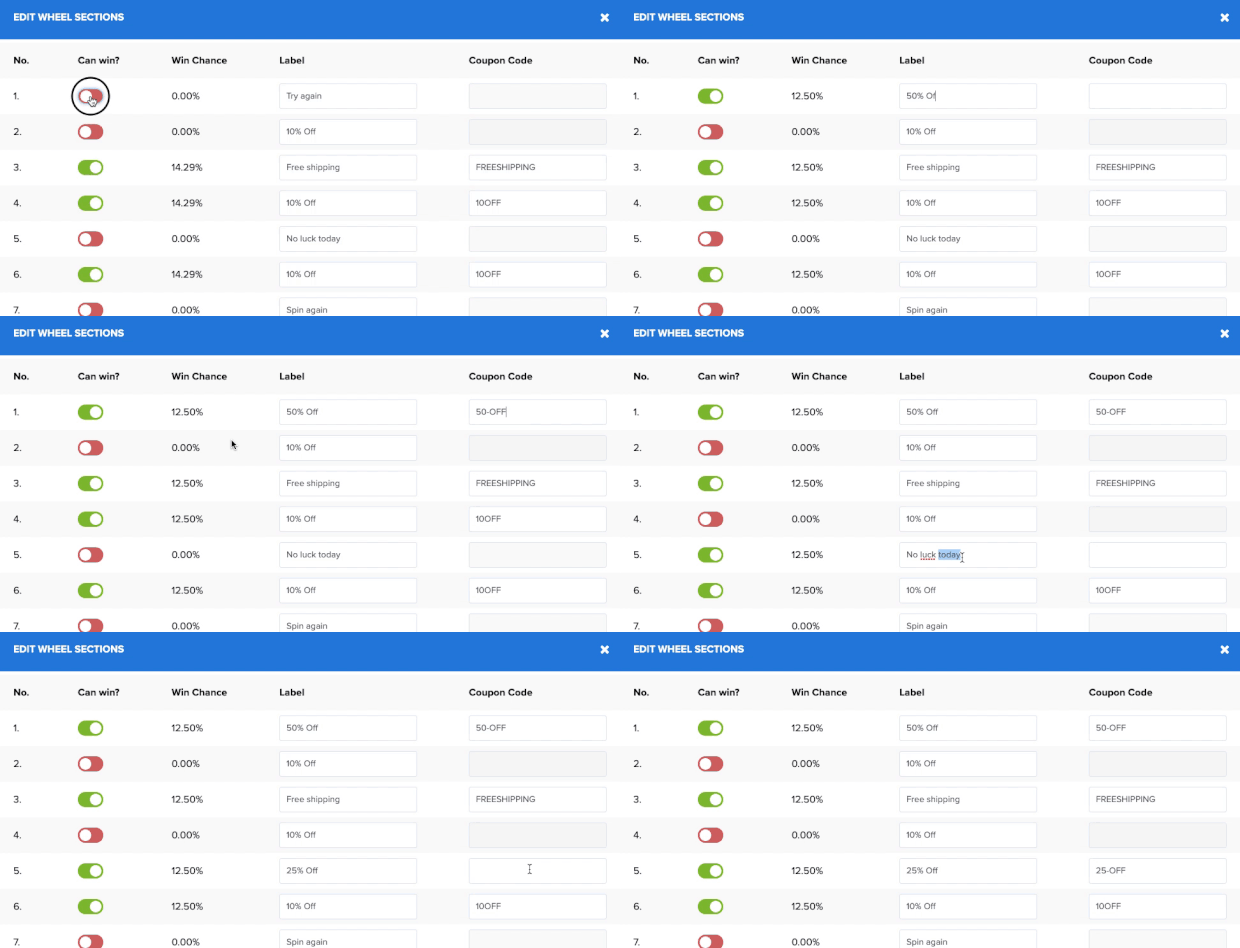
Here you can witness several options you can modify. This allows you to add coupon codes and special offers to the wheel. You can select whether or not each option has a chance of winning. When you turn an option off or on, the win percentage will be automatically recalculated. This will allow you to create the perfect gamified popup for your website.
Step 5 – Set Your Display Rules
Now, you have almost set and you have to finalise some more things which are setting your display rules. Here you need to select when you want to spin to win the campaign to be displayed on your website or online store. OptinMonster gives you some powerful display and targeting options which allow you to trigger the spinner anywhere and at any time on your website.
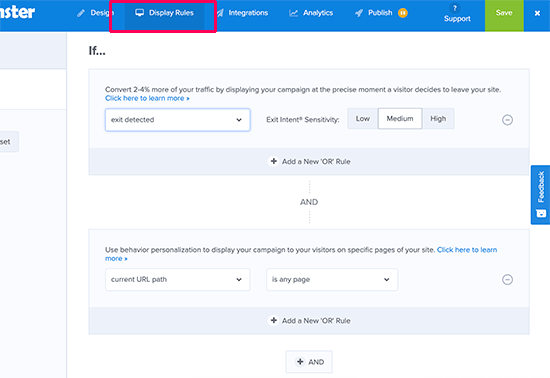
Alright, switch to the “Display Rules” tab at the top in the OptinMonster dashboard and then select different display rule sets for your campaign. I recommend using the “Exit Intent” rule which is one of my favourites to launch the spin the wheel campaign. So, by adding this rule, when a user tries to leave your website or online store, the spin to win campaign automatically appears on the page.
By this way, you can keep your user interacting with your website. After adding the Display rules click on the next step button. Now you will be asked to select a view. Select the Optin view and click on the next step button. Once you are done with this, Don’t forget to click on the Save button at the top to store your changes.
Step 6 – Integrate With Your Email service provider
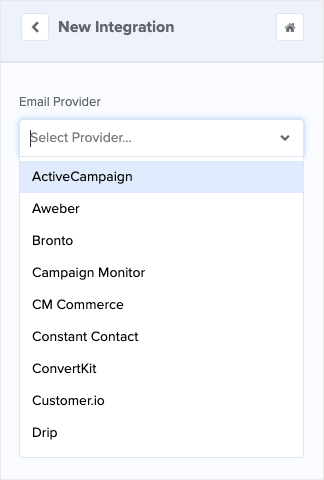
Next to the Display rules button at the top, you could find the Integrations tab. Click on Integrations to add your favourite email service provider. The main purpose to create this campaign is to grow your email list. So, integrating your email service provider is one of the essential steps.

OptinMonster can integrate with any email service provider in the market, so just choose from the dropdown list.
Step 7 – Publish Your Campaign
Finally, we have finished the campaign. Now, you need to publish your campaign. Go to the OptinMonster dashboard. Switch to the “publisher” tab and check the toggle next to the “status” option.
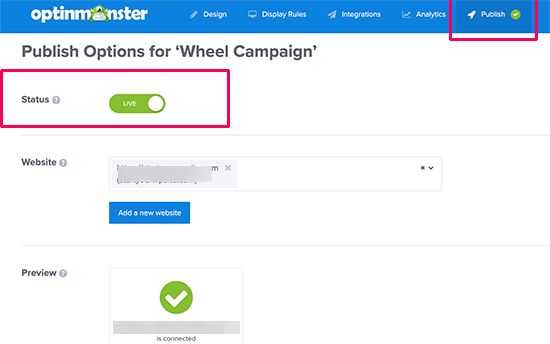
Don’t forget to save the changes done to your campaign.
Conclusion
With this tutorial, I hope you have learned How to Create Spin to Win Campaigns in WooCommerce and Shopify. Do you know that 70 per cent of shoppers abandon their carts and never return to complete their purchases? With the help of these gamified spin to win campaigns wheel, you can reduce the cart abandonment and with the help of OptinMonster, you can achieve huge sales.
Check out OptinMonster to claim some exciting deals with the above link. To see more articles on WordPress, Tech, Travel and more Do sign up to my Newsletter.
Like this Post? Do share it with your friends
Continue reading my posts on-
- How To Increase Conversions with Easy Multi-Step Popups with MonsterLinks
- How to Create a Multi-Step Form in WordPress
- 4 Most powerful and useful WordPress Tools.
- Travel, Thunderbird and Coffee
- How to collect Paypal payments on your WordPress site
- How to Easily Boost Your Email List with Content Locking


Leave a Reply