Hello there!!. In this article, I’ll show you How To Increase Conversions with Easy Multi-Step Popups with Yes/No campaign.
If you are straightaway here, then I would suggest you take a look at my article on How To Increase Conversions with Easy Multi-Step Popups with MonsterLinks. If you are not aware of Multi-step popup, do take a look at the article.
If you have read the previous article, then I would like to tell you that, this method is also one of the easiest ways to increase conversions.
so, let’s get into the topic.
How To Increase Conversions with Easy Multi-Step Popups with Yes/No campaign
To start this process First, you have to download the OptinMonster plugin. OptinMonster is one of the best plugins available in the market. You can not only create Multi-Step popups with Yes/No campaign but you can do a lot more with the latest OptinMonster plugin.
In this Multi-Step Popup campaign particularly, We will create a Yes/No campaign instead of asking your users to take action right away. Your Users will be presented with a simple Yes/No question. As you know, our main goal will be making them click the Yes. To do that, I request you to follow the below steps.
Step 1 – Create Your Multi-Step Popup
To create a Multi-Step popup, you will be required to do almost exactly like the previous one. You will need to create a new campaign from your dashboard.
Now select Popup as your campaign type. After that process, choose your template from those various designs and then customize it according to your needs. You have around 50+ templates in OptinMonster from which you can select one for your campaign.
Now all you need to do is to name your campaign and assign it to your website. Then click on Start building. If you need to see a detailed version of this step, check out my article on In this specific article, we are going to see How To Increase Conversions with Easy Multi-Step Popups with MonsterLinks.
Step 2 – Add Your Yes/No Button
At the top of your editor, click the Yes/No option. Through this, you can make your campaign a unique one.

Now, click on Enable Yes/No for this campaign.
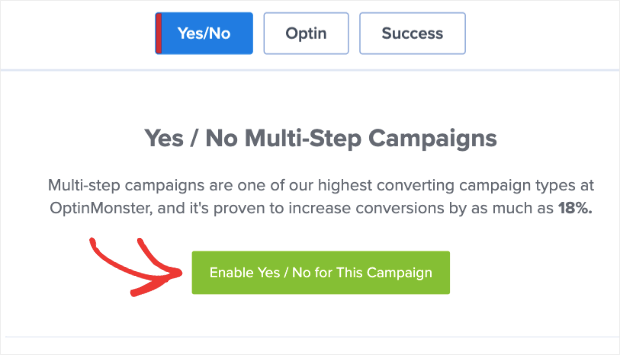
After this step, it will automatically create a new page in your Popup campaign.

In this campaign, as mentioned in the name, you will notice that your Yes/No popup starts with a basic “Yes/No” question. Now all you need to know is to customise your Yes/No campaign. It’s pretty easy, you have to be aware of modifying your Yes/No buttons.
To do that, click on the Yes button to start editing it through your block editor. Let me show you where to look after,
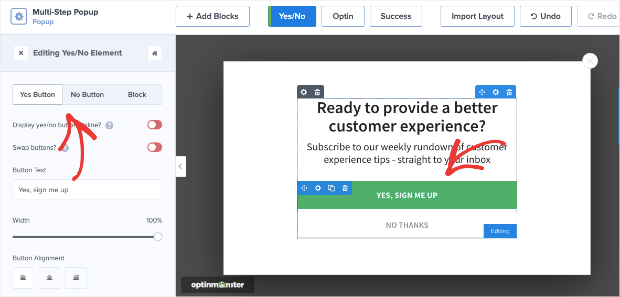
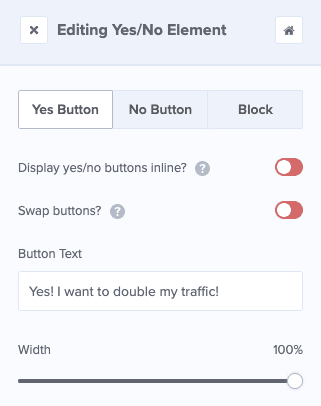
I hope now, you know what to do. Alright, what are the things to be aware of next?… Things which can be modified. You can modify things like Yes button, No button, Block. You can easily edit and modify any part of the Yes/No block.
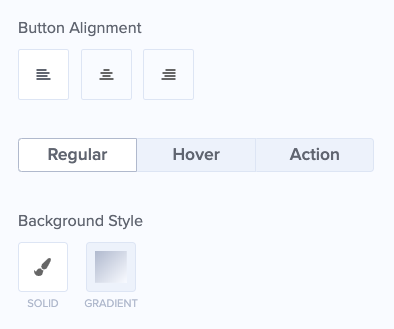
So, now let’s move on to the appearance part. You will see that you have these three options for customizing your Yes/No button. One is the Regular which has some editing options like changing the colour, text, border, etc… The second one is the Hover through which you can customise how your button looks when the user’s cursor hovers the button. The third one is the Action through which you can modify what happens when the user clicks on the button.
You can find an option named Button click action through which you can modify the actions of the Yes/No buttons. Through Button click action tab you have the power to redirect your users to a URL, you can use your button for click to call or to close campaign. You can also use your button for Go to a view(the Optin or success page) and more. so, decide which option you want to use for your Yes/No campaign.

Let me show you how it will look when a user clicks the Yes option.

Now, Let’s move to the next step.
Step 3 – Set Your Display Rules
To set your display rules, click the Display rules block at the top of your editor.

Your display rules are set for 2 conditions by default.
- Shows on every page of your website.
- Time on page is at least 5 seconds.
You have a lot of display rules from which you can choose for your campaign needs. One of the best display rules choice is the famous Exit-intent by OptinMonster, which displays your multi-step popup when a user tries to leave your website. Simply click on the condition you want to modify. Once you click the display rules you can modify it too.

You can enable this feature for both desktop and mobile devices. Once after you finish this process click on the Save and publish your campaign. You can also choose the amount of sensitivity for your exit-intent campaign.

It has three levels of sensitivity named as Low, Medium, High. This will help you to recover visitors who are leaving your website.
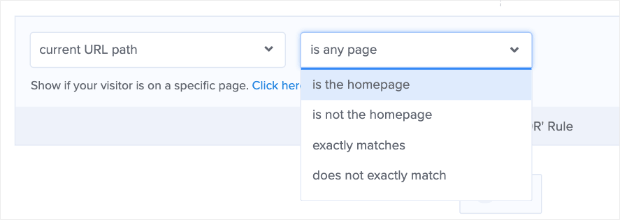
With OptinMonster you can show the multi-step popup on any page you like to display. To do that, you need to set the second display rule, which is by using the current URL path.

You can see in the above image it has been set to the current URL path and in the right, you can see the “is any page”. You can change the is any page to a variety of options, like “Just the homepage”, “Exactly matches”, Does not exactly match”, “contains”, “is not the homepage”, etc.. You can see the options I mentioned above, in the below image.
If you wish to show this Multi-Step popup to specifically on one page, you can enter the URL of that page too. Like the below image.

With OptinMonster you can choose anywhere to place the Multi-Step popup. When it is placed in a perfect place and its set to display at the perfect time, then your visitors are more likely to turn into your subscribers. Check out some offers from the OptinMonster plugin with the link below.
After you are finished with the Display rule, it’s time for you to save and Publish your new campaign. You can also integrate with your favourite E-Mail service provider. So now, you know How To Increase Conversions with Easy Multi-Step Popups with Yes/No campaign. To see more articles on WordPress, Tech, Travel and more Do sign up to my Newsletter.
Like this Post? Do share it with your friends
Continue reading my posts on-
- How To Increase Conversions with Easy Multi-Step Popups with MonsterLinks
- How to Create a Multi-Step Form in WordPress
- The Ultimate WordPress Poll Plugin( With Images)
- How to Easily Boost Your Email List with Content Locking
- How to Create a WordPress Order Form With Online Payments
- Travel, Thunderbird and Coffee
- How to Quickly Export WordPress Analytics with Google Analytics
- How to Create Easy Notification Bars for Your Shopify/WooCommerce Website


Leave a Reply