Before entering into this post How to Create Easy Notification Bars for Your Shopify/WooCommerce Website, You should be aware of what’s an Announcement/Notification bar is.
List of Contents
What is an Announcement/Notification bar?
An announcement bar is something that lets every visitor see your important news or offers. It is considered to be one of the easiest ways to get a visitor’s attention. You could tell your customers about your deals and time-limited sales.
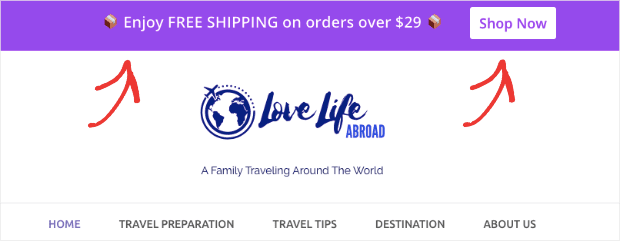
The Announcement/Notification bar is a banner notification that can be placed at the top or bottom of your website’s page. You could not only announce deals and offers there, but you could also let your audience to know about your
- Product launches
- Lead magnets
- New Content on your site
- Special promotional offers and much more.
You could see a lot of plugins that could help you do this but the easiest and time-consuming way to create the Notification banners is by using the OptinMonster plugin. With the help of OptinMonster plugin, you could add these Announcement bars to whatever site’s you hold. You can see the complete features about the OptinMonster plugin with the below link.
In this article let’s see How to Create Easy Notification Bars for Your Shopify/WooCommerce Website. Let me first tell you something, Notification bars and Announcement bars are almost the same. So, I request not to get confused.
How to Create Easy Notification Bars for Your Shopify/WooCommerce Website
First, let’s see How to Create Easy Announcement Bar/Notification Bars for Your WooCommerce and Shopify. Let’s just see the steps in common and I’ll tell you how to integrate to your website’s at the end. To start this, all you need is an OptinMonster account. To create one, click below link to create one.
Create your OptinMonster Account
Step 1 – Design your Notification Bar
After creating your OptinMonster Account, Log into your OptinMonster account.
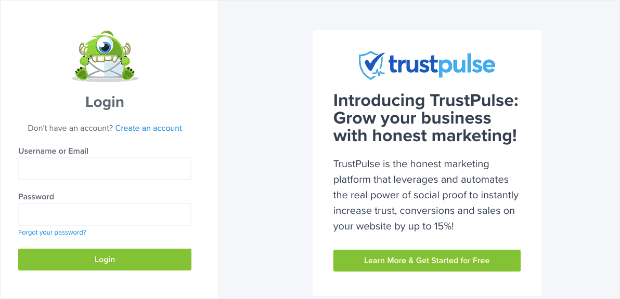
After you log in to your account, all you need to do is to start your Campaign type. For our WooCommerce/ Shopify announcement notification bar, We have to choose the Floating Bar.

After choosing that, you can see a lot of templates to start your own campaigns. OptinMonsters has already optimized those templates to work across desktop, tablets and mobile devices.
For example, let’s just choose the alert template because it can be customized to fit many use cases
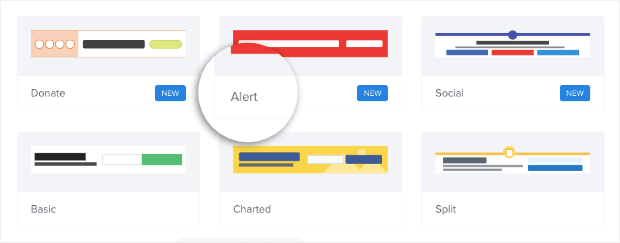
Now, all you need to do is to name your campaign and connect it with your WooCommerce/Shopify website, and click start building

Now, we are all set to customize your campaign.
Step 2 – Customize your Campaign
To customize your notification bar, Click on the part of your campaign that you want to edit. This will bring up the editing tools on the left-hand side menu.
For eg: You can change the text of your message.

Choose the background colour to match your brand,

or you can redirect your users to another page by changing your WooCommerce announcement button Action,
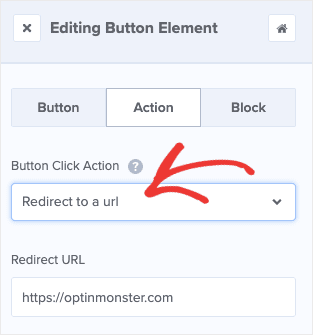
You can change whatever changes to your campaign within a short time. By default, your notification bar will rest at the bottom of your browser, but you can easily bring that to the top.
For that, I suggest you get into the home menu of your editor and click Floating Settings.

Then activate the toggles switch to Load floating bar at the top,

Step 3 – Enable the Yes Button
So, as you know we are going to make an announcement so we don’t need an email field for that. How to change this?. To do so, just go to Yes/No, and click the toggle to enable it. The display will change to show you two buttons.

Now, scroll down to No Button, and disable the no button, so you are left with a single button for visitors to click to take advantage of your announcement.

Now get back up to Yes button, and go to Yes Text to change the button text.

After that, Choose Yes action through which we use to redirect our user’s or customers to a new page. Add the URL of the product category where you have the sale.

You also have the option to change the font, colour and border colour of the yes button in this section.

Step 4 – Change the display rules
Now, go to Display rules to decide your campaign will display. By default, the After ‘X’ seconds display rule is enabled, in order to ensure that you capture everyone’s eyes with your announcement after they have been o your site for a while.
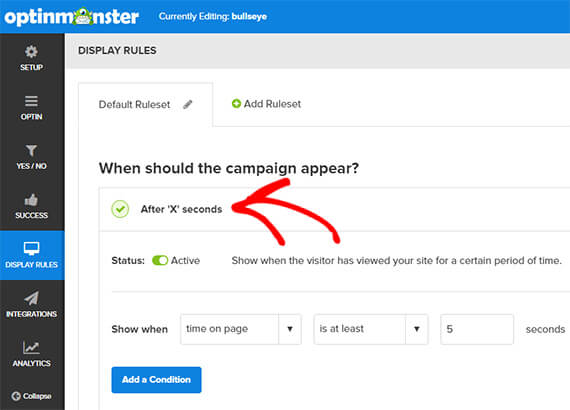
If you want to make your announcement/ Notification bar permanent, so you don’t miss any customers/or visitors see it you can set the default timing to 0. So that your visitors would see it all time.

For adding your announcement to specific pages, I would suggest you follow the below steps. Whatever the case may be, you can easily decide where you want your WooCommerce/Shopify announcement bar to appear on your site.
To do that, change the second condition of your display rules in the default settings. leave the field current URL path as it is. But in the next field over, change is any page to exactly matches.
If you are adding your WooCommerce/Shopify store it looks likes this, for example, purpose we have added using WooCommerce store. The exact same step is possible with Shopify store,

You can then add the specific URL that you want your WooCommerce announcement bar to appear on.

If you want to add more page, simply click the +And button to create a new rule:

Once you have finished with these steps, like when and where to place all you have to do is to save and publish. There you go, You have created your Notification Bars for Your Shopify/WooCommerce Website.
Now in the next step let’s see how to connect it to your WooCommerce or Shopify website.
Adding your Announcement/Notification bar to your WooCommerce Store
WooCommerce is a WordPress plugin which helps us to easily sync with OptinMonster. In your WordPress dashboard, Install and find the OptinMonster plugin on the left-hand side menu.
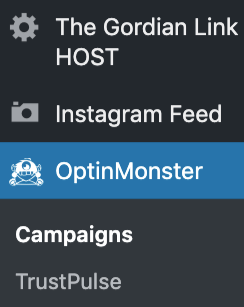
After you install the plugin, in your OptinMonster dashboard, find and click on the WooCommerce tab,
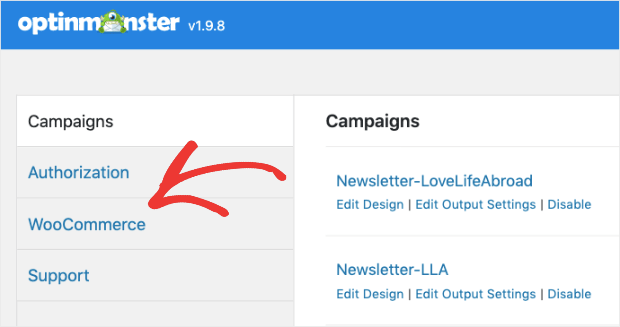
Now you will see two blank fields that need information,
- Consumer key and
- Consumer secret
You can go get those manually from your WooCommerce account, you can also click AutoGenerate keys.

With Autogenerate keys it will automatically fill those two for you. That’s it, you are connected to your WooCommerce store. When it’s done you will get a confirmation message like the below example.
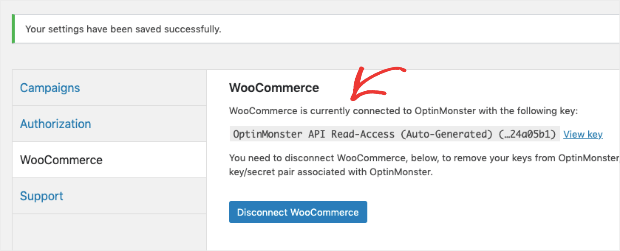
From this step, you have the advantage to manage your campaigns from your WordPress dashboard through the OptinMonster plugin and also from your OptinMonster account.
Adding your Announcement/Notification bar to your Shopify Store
Adding your Shopify store is also an easy process. For that, all you need to do is log into your Shopify account.

Now, log into your OptinMonster account simultaneously. Now, visit the OptinMonster app in the Shopify store. Find and click Add App.

You will be redirected to another page where you need to click Install app.
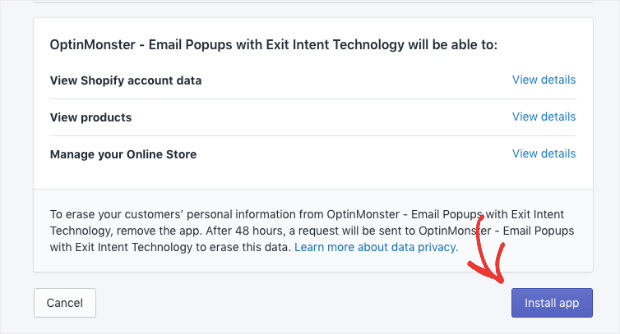
After this process, your Shopify store will automatically connect with OptinMonster. And there you go you have integrated your Shopify account with OptinMonster. and now you can create your own campaign and publish your Announcement/Notification bar on your website.
Now, you know How to Create Easy Notification Bars for Your Shopify/WooCommerce Website with the help of OptinMonster. To check out OptinMonster you can click on the below link,
To see more articles on WordPress, Tech, Travel and more Do sign up to my Newsletter.
Like this Post? Do share it with your friends
Continue reading my posts on-
- Console Wars 2020 [Xbox Series X VS Ps5]
- How to Add Google Analytics in WooCommerce website
- How to create an engaging Multi-step form with WPForms
- Thalli Pogadhey (Chennai to Pondicherry Road trip)
- How to Create Polls in WordPress
- WordPress.com Vs WordPress.org
- Chennai to Bangalore Road Trip
- Life Is Hard than we Think!
- How to send Confirmation emails on your WordPress website


Leave a Reply