Not sure about What is Exit-Intent Popups? Well, in this article I’ll show you what is an Exit-Intent, Ideas of how to implement it and How to Easily Create Awesome Exit Intent Popups.
List of Contents
Exit-Intent popups
Exit-Intent popups are a kind of popups that will be triggered when a user or a customer tries to navigate away from your website. As I said it is a Kind of Popup through which you can display a call-to-action message like you can display an offer on your site or you can display with a signup form for your subscription etc… Exit- Intent could be displayed as a Floating bar, slide-in, in Fullscreen.
It’s one of the best ways to convert an abandoning visitor into your valuable customers or follower. With exit-Intent, you can
- Generate More Subscribers
- Increase your eCommerce revenue
- Generate leads for business
- Can make your user stay longer in your Website
Exit-Intent is considered to be one of the most effective campaign triggers and also it is proven to be increasing conversions by 2x or more.
Some Ideas to drive your Sales
- Make sure to Greet your abandoning customer or user with their name. You can personalize them in the exit-intent popup.
- If you are holding an eCommerce store offer them a Discount or offer them Free shipping or offer them a free trial to make them stay longer on your site and which could convert them into your customers.
- Offer your audience a message to Upgrade, so they will try to get the idea of upgrading.
- Suggest them with some related posts if you are holding a blog or a magazine site. This makes them visit your other posts.
- Give your user a reminder in order to make them do some actions on your site.
- One of the main things you have to do is to personalize by Referral source.
I hope you got some idea about how to improve your Exit-intent Popups, now let’s see about How to Easily Create Awesome Exit Intent Popups.
How to Easily Create Awesome Exit Intent Popups
To create an Exit-intent popup you have to install the OptinMonster plugin on your WordPress website. OptinMonster is one of the best Lead-generation plugin available in the market. You can check out the features of OptinMonster and install it with the below link,
Remember to create your popup from your OptinMonster account and not in your WordPress dashboard. The OptinMonster plugin just works as a connector between your Website and your OptinMonster. If you are planning to take full advantage of your exit-intent popup campaign I would suggest you go with the OptinMonster pro plan. Alright, Follow the upcoming steps in order to know How to Easily Create Awesome Exit Intent Popups.
Step 1 – Install the OptinMonster Plugin
Get into your WordPress Dashboard and go to your Plugin section. With the help of the search bar check for the OptinMonster Plugin and install it. After you installed it on your website, head to your OptinMonster website and create an Account and Connect your OptinMonster account with your WordPress website with the instructions provided by them.
Step 2 – Create a Campaign
After you signed up with your OptinMonster pro account, log in to your Dashboard and click on the Create New Campaign button.

Step 3 – Choose a Campaign type
In this step choose your Campaign type as Popup.

Step 4 – Choose a template and Name your Campaign
After step 3 you will be displayed with various templates and you will be asked to choose the template according to your needs. Choose and template which suits your requirement and then continue. You will now be asked to name your campaign. There, name your campaign and choose your website from the dropdown menu.

Step 5 – Customize your Popup
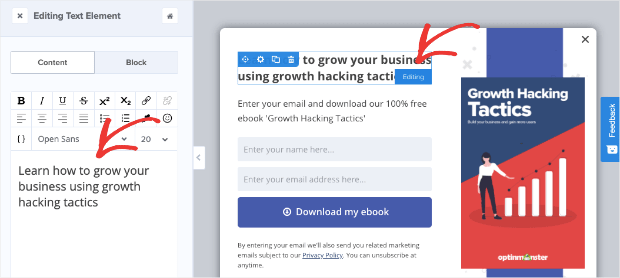
You will be shown various customising options like editing a text, adding a picture, changing the colour and lots more. Do change those according to your needs and click the save changes button.

Step 6 – Choose Display rules
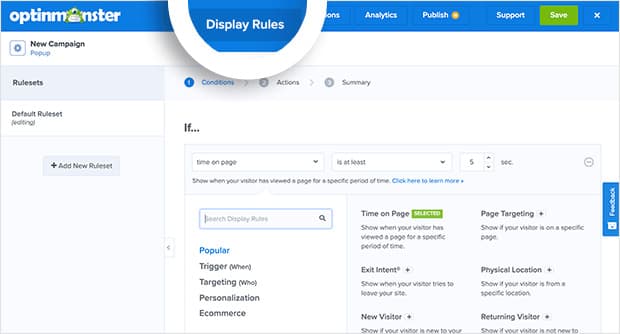
I have written a separate article on How to set up display rules for a popup. Do check it out to find out the in-depth detail about setting up the display rules. You can click on the display rules and set them accordingly to your needs.

Step 7 – Select Campaign view
After you complete step 6 click on the Next Step button to choose the then action where you should select the Optin option from the drop-down menu and then click on the Next Step button.

Step 8 – Integrate with Your Email Marketing Platform and Publish your popup
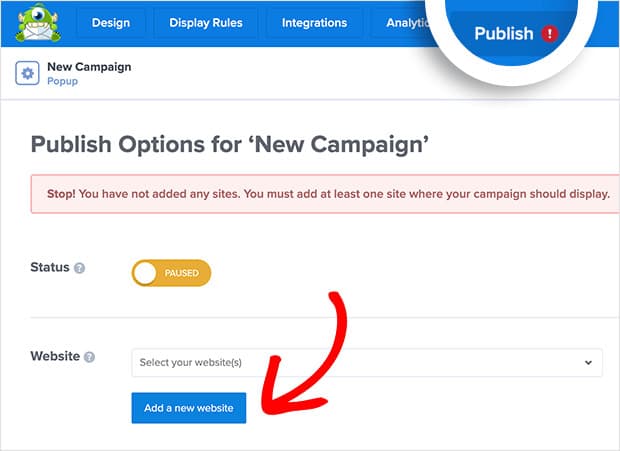
If you wish to collect details from the user then click on the integration button and choose your favourite email marketing provider to integrate your popup with them. After you complete the step, head to the top right where you will find the Publish button. Click the button to publish your popup.

That’s it… Now you know How to Easily Create Awesome Exit Intent Popups. You can do a lot more with the new OptinMonster plugin so, don’t forget to check out some coolest feature from OptinMonster from the below link,
To see more articles on Tech, Travel, WordPress and more Do-Follow my Newsletter.
Like this Post? Do share it with your friends
Continue reading my posts on-
- How to Create Easy Notification Bars for Your Shopify/WooCommerce Website
- How to Boost Sales with Countdown Timer Popups
- MonsterInsights New E-commerce Tracking For WordPress
- How to Create a Popup Coupon that Boosts Sales
- How to Quickly Create Lightbox Popups for WooCommerce
- MonsterInsights’ eCommerce Addon Integration with GiveWP and Restricted Content Pro
- How to Create a Multi-Step Form in WordPress
- How to Create Polls on your WordPress Website


Leave a Reply